Tuesday, October 27, 2015

Polka Dot Madness...Part 2

Here are some pics of our Kusama project...
First the pumpkins-


Next came the "infinity nets" for the ground...


And triangles for the background...

 And finally, our "Obliteration Chair" inspired by her exhibit at the Tate Museum...


The finished projects are displayed on the hallway bulletin board!! 


Polka Dot Madness

We have been going crazy with Polka Dots in Fourth grade!!!!   Polka dots are invading my dreams and keeping me up at night!!  

Our Fourth Grade artists examined the art of Yayoi Kusama.  Yayoi Kusama has been called the “Queen of Polka Dots.”  Her art is absolutely filled with polka dots. In fact, most of the time, SHE is covered in polka dots.! Patterns, polka dots, bold colors and interactive installation pieces – this is the art of Yayoi Kusama.

Yayoi Kusama (born March 22,1929) is a Japanese artist and writer. Throughout her career she has worked in a wide variety of media, including painting,collage, sculpture, performance art, and environmental installations, most of which exhibit her  interest in psychedelic colors, repetition and pattern.  She came to New York in the late 1950’s and had a great influence on Pop Artist’s Andy Warhol and Claes Oldenburg. Although she was largely forgotten after leaving the New York art scene in the early 1970s, Kusama is now acknowledged as one of the most important living artists to come out of Japan. Polka dots and pumpkins are an important motif in Yayoi Kusama’s work, a fascination that extends from the artist’s childhood during the years of World War Two. Her family’s business was in the grocery industry, and the Kusama storehouse was always full of pumpkins. Even though she became sick of eating them all the time, Kusama has been fascinated with the pumpkin’s irregular, bulbous form.

For our art project, we looked at her art, specifically her “Infinity Nets” and pumpkin paintings. Infinity Nets look like a mass of small dots covering the picture plane. Next, we studied her pumpkin pictures and talked about the dot placement and size and the interesting shapes she used to create pumpkin forms.

Finally, we watched a time lapse video of her exhibit at the Tate Museum called the “Obliteration Room”. Guests to the museum were invited to take part in a free interactive project in which they can help transform a blank white room into a spotty, dotty and colorful space with thousands of polka dots. Visitors entered an entirely white space, furnished as a monochrome living room, and were invited to cover it with multi-colored stickers. Over the course of a few weeks the room is transformed from a blank canvas into an explosion of color, with thousands of spots stuck over every surface by children and their families.  I painted a classroom chair white and each time they attended art students were given dots to stick onto the chair in any arrangement they chose.  The finished project is AWESOME, and everyone wants to sit on it!


Tuesday, October 13, 2015

happy fall, y'all!!!!

Our third graders have been busy celebrating the arrival of fall!  We started off looking at leaves and applying all the elements of art to a single leaf.  Students found that a leaf had texture, line, color, shape, value, and space (positive).  The only element of art a leaf does not have is form -3D.  Each third grade class completed a different project using a leaf as inspiration.


Mrs.  Murray's class painted the underside of the leaf white and made prints on black paper.  Next they took small sponges and filled in the negative space with tempera paint in the color of their choice.  These were really fun and look beautiful when finished!  Originally mad on 9 X 12 paper and then were cut down to 9 X 9.  I laminated the extra 3 X 12 strips for each student to use as a bookmark.


Mrs. Ward's students chose a leaf template and applied pattern to different sections of the leaf using sharpie.  For the background we used a shiny silver poster board and printed leaves in black around their pattern leaves.  They used block printing ink and brayers to complete their piece.
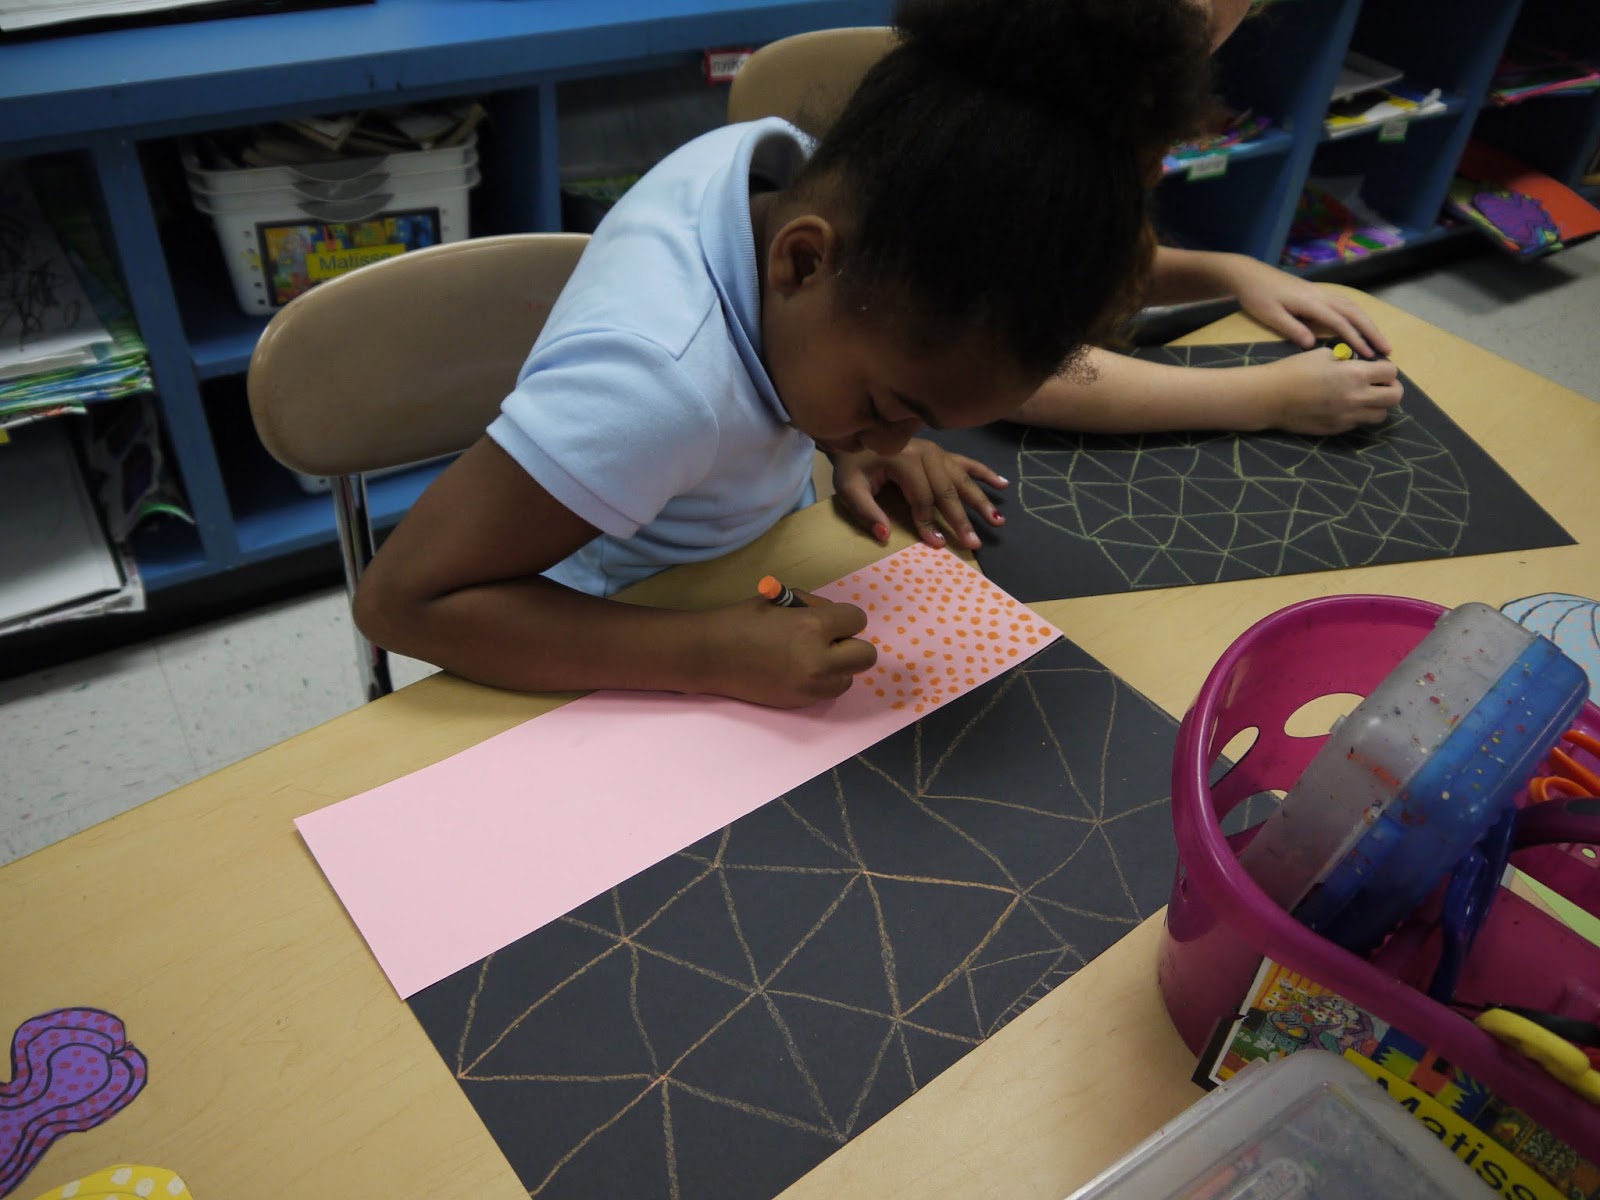
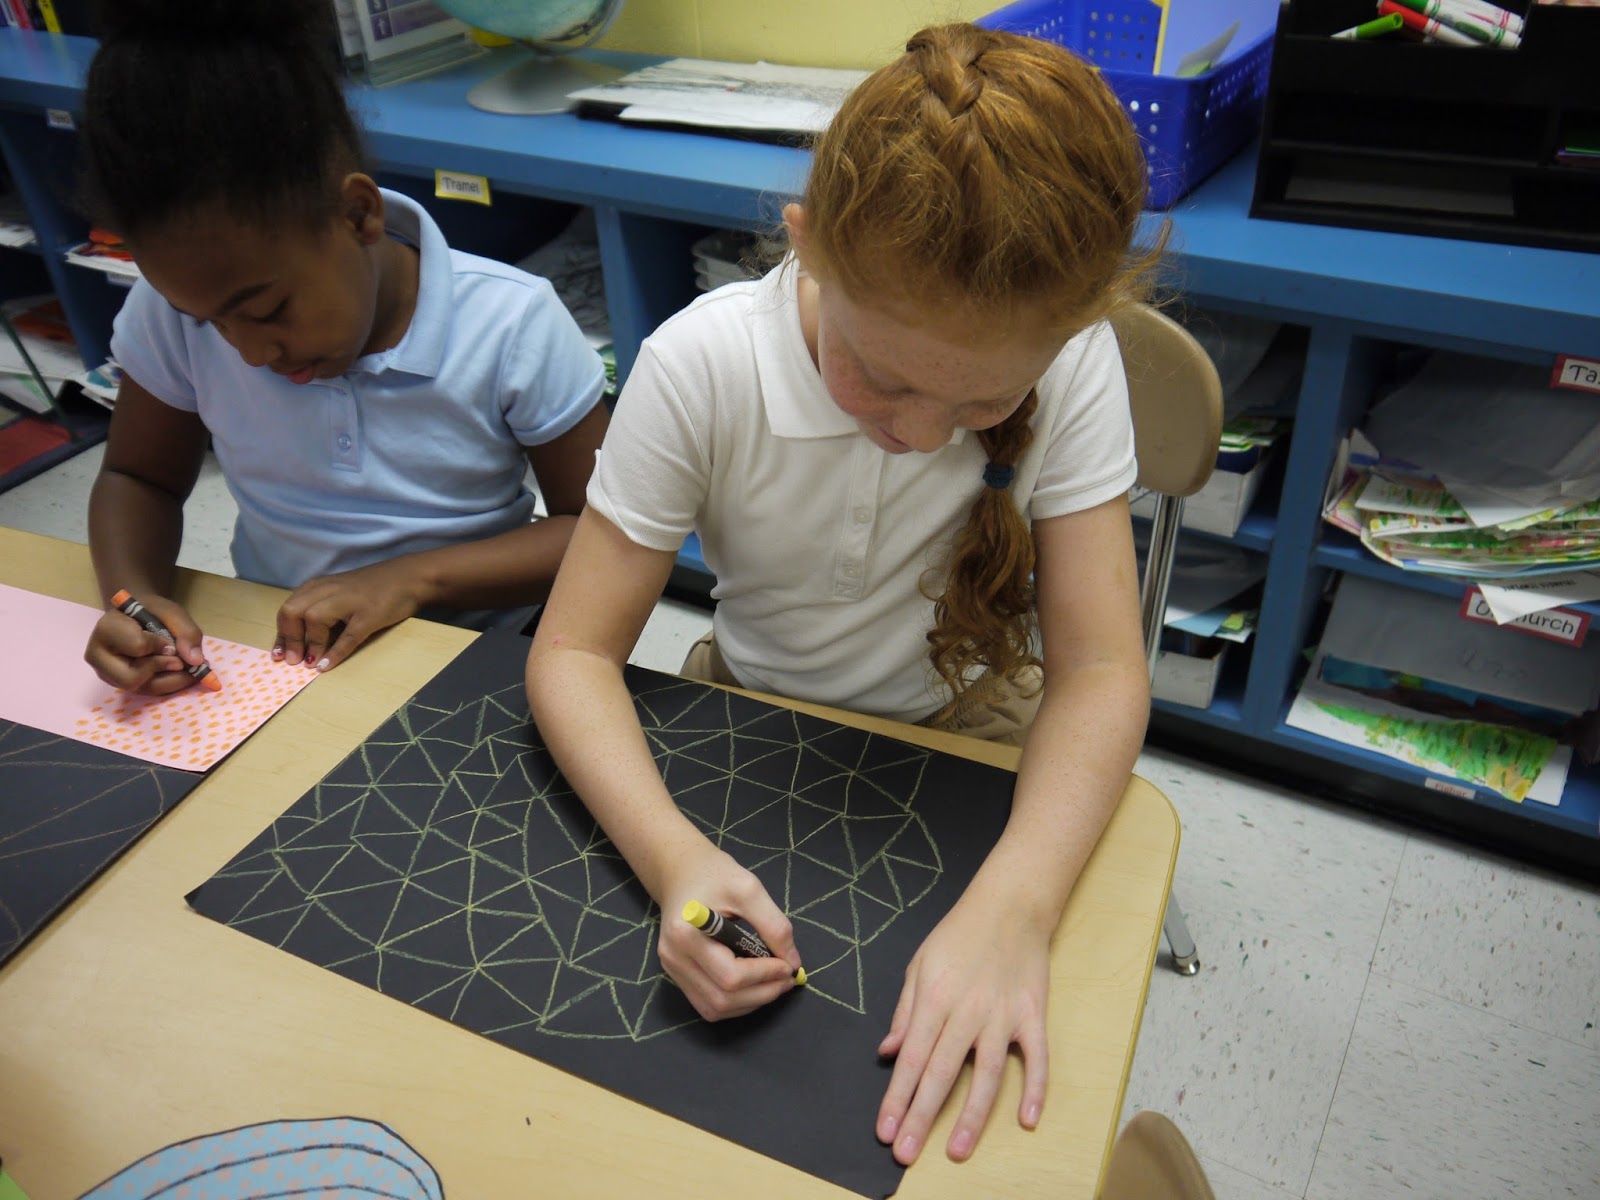
Here are some of the students completing their line and shape patterns.

Finished projects!


 Mrs. Baltimore's students started off their projects by watercoloring the background.  Some students chose to add salt, bubble wrap, and plastic wrap to create a texture.  After it was dry, students printed leaves in the background using synthetic rubber leaves form Sax Leaf Nature Expressions Set.


Mrs. Taylor's class created a project I found on Cassie Stephens blog.  For complete instructions, visit her post -  http://cassiestephens.blogspot.com/2012/03/leaf-relief.html  She is an amazing art teacher in Franklin, TN at Johnson Elementary... just a stone's throw away!  Not really, but we are Nashville neighbors!  My student's loved doing this project!!!  The results are definitely frame worthy :)

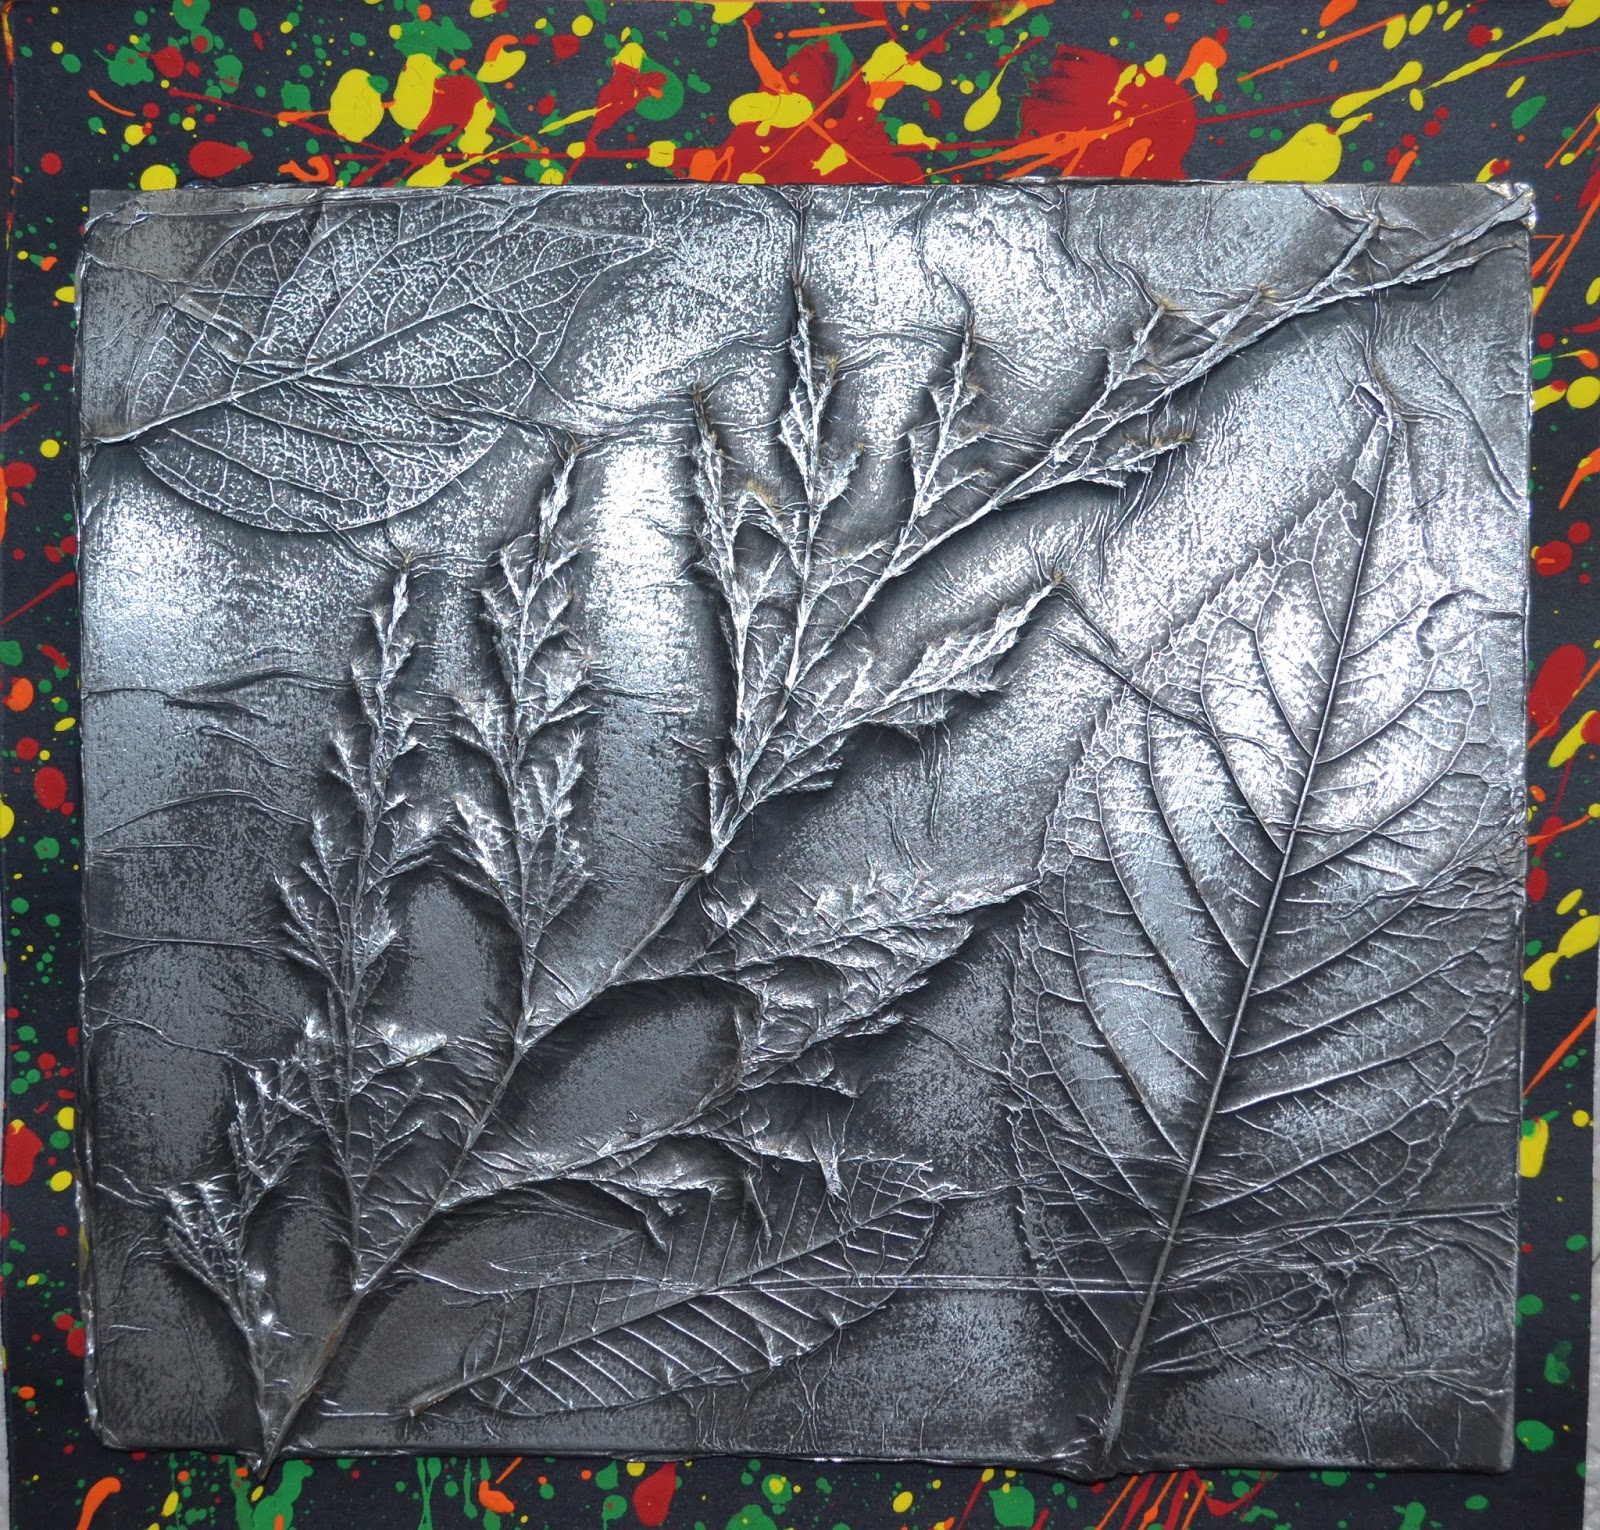
 Students went outside and collected several leaves.  They arranged them vein side up into an interesting composition on mat board.  When satisfied with the arrangement, they carefully moved them to the side and I sprayed their board with spray adhesive. The leaves were placed back on the board and sprayed again.  A piece of foil was laid on top and students gently smoothed out the foil and pressed the foil into all the veins and crevices on the leaves.  When dry, we took them outside and sprayed all of them with black spray paint.  The next class, students used extra fine steel wool to take off some of the black paint revealing the shape and texture of the leaves.  It was one of the AAAAWWWWEEEE moments in the Art Room!  I love those!!!  Finally they created a spatter painted background using fall colors on black poster board.  It was a little messy, but colors complement the beautiful foil reliefs!


Monday, October 12, 2015

Fall Leaf Collaborative Quilt


Third Grade Artists worked together to create a collaborative leaf quilt.  Each class completed a different leaf themed project for the quilt.  More details to follow!  It hangs in the front hallway of our school and is a great complement to our colorful tiled floors.  The display is a beautiful reminder of the changing seasons as we all look forward to Autumn festivities!


Monday, September 14, 2015

Self Portraits for Everyone!

It's that time of year AGAIN...  Our students are making self portraits for the ART TO REMEMBER fundraiser.  We love this company.  They do a great job turning our kids artwork into wonderful keepsakes for their parents to enjoy.  Every year each grade completes their portrait in a different style and medium.  My favorite product is the magnet.  I have all of my daughter's magnets across the top of the fridge and have enjoyed them for many years.  It is fun to see the progression of their talents as they get older.

Third graders learn about Pablo Picasso and  review cubism.  They first learned about his blue period in second grade. Making their portraits in this crazy abstract way is really fun and allows everyone to have success.  Almost anything they do works in the cubist framework.  We also learn about complementary colors (colors that are across from each other on the color wheel) as we paint the face and analogous colors (3 colors that are next to each other on the color wheel)as we color in the "broken mirror effect" in the background.